So you want to use Amazon Web Services’ Amazon S3 cloud storage solution to store some files. Or maybe you want to leverage your S3 bucket to host a website. Either way, you can start here. I will guide you through the process, showing you how you can easily create an S3 bucket from your AWS Management Console. Let’s do it!
What is an S3 bucket?
An S3 bucket is a cloud storage solution offered by Amazon Web Services (AWS). It allows you to store and retrieve files or objects from anywhere in the world. You can think of it as a virtual hard drive in the cloud.
A capability of S3 is its website hosting feature, where you can host a static website by simply enabling the optional static website hosting feature on your S3 bucket. You would select the desired html file stored in your S3 bucket that will serve as your webpage content.
Amazon S3 is available for a pretty low rate while scaling to handle millions of users. It is also available under the AWS Free Tier within a certain capacity.
Prerequisites:
1. AWS Account To get started, you will need an AWS account. If you don’t have one yet, don’t worry, it’s simple and free to create one on aws.amazon.com. You will need a valid credit card for identity verification. This will also be the card that will be charged if you insure any service charges.
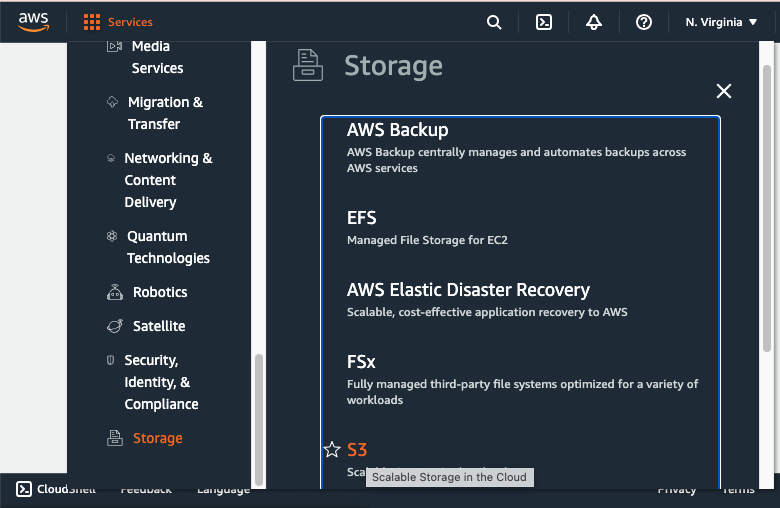
Here are the simple steps to create an Amazon S3 Bucket:
1. Navigate to S3
Once you’re logged in, navigate to the S3 service. You can do this from the waffle button on the top left.
- Click waffle button.
- Scroll down and click on “Storage”
- Then on “S3”.
2. Create the S3 Bucket
Now let’s walk throught the steps to create the bucket.
- Click on the “Create Bucket” button.
- Give your bucket a unique name. (If you plan to host this bucket as a static website, consider using a name you’d like your url to include.)
- Choose a region. Best practice is to choose a region that is closest to your users to ensure low latency (fast access times).
-
Configure access. By default, S3 bucket configurations are set to private. This is an appreciable feature that was implemented in response to private company information being exposed through buckets mistakenly left open to the public.
Keep public access blocked, that is unless you’re using this bucket for website hosting which means you’ll in fact need to allow public access to make content available to the world on the internet.
Or keep private, and specify who can access it and what they can do with the files inside later.
- Decide if you’d like to enable versioning. Versioning allows you to keep multiple versions of your files, and set up logging to track access to your bucket.
- Click “Create bucket”.
3. Upload Your Files
Now that you’ve created your S3 bucket, you can start uploading your files.
One thing to keep in mind is that you will be charged for the storage you use in your S3 bucket. The pricing varies based on the the amount of data you store and depending on the region you choose. You can check the AWS website for more information on Amazon S3 pricing. Also consider exploring AWS Free Tiers page to see how you can take advantage of S3 without incurring any charges. For instance, you may note standard S3 storage of up to 5GB is free for new users for the first 12 months.
To upload an object to a bucket:
- In the Buckets list, choose the name of the bucket that you want to upload your object to.
- On the Objects tab for your bucket, choose Upload.
- Under Files and folders, choose Add files.
- Choose a file to upload, and then choose Open.
- Choose Upload.
There. You have successfully created an S3 bucket and uploaded an object(s) to your bucket! Well done.