So you’ve created a new AWS account, nice! As a new AWS user its good to make sure you set up some essential steps pertaining to security, cost awareness, and other preparations. I will be sharing a series of blog posts decicated to ensuring we start off well suited as we begin to navigate the AWS cloud environment.
Let’s start with securing our powerful root account by implementing multi-factor authenticatiom (MFA).
1. Activate MFA for root account
One of the first steps you should take after creating an AWS account is enable multi-factor authentication (MFA) for your AWS root account (the account that is created at the opening of an AWS account). MFA adds an extra layer of security by requiring more than just your username and password to access an account, such as an authentication code sent to your phone. Making it much harder for unauthorized users to access your account, even if they somehow obtain your password.
You will find a few MFA device options compatible with AWS such as specific security key and security token hardware devices, which you would purchase, and specific virtual MFA devices in the form of a compatible application on your phone, tablet, apple watch, or computer.
I will run you through the process of configuring a virtual MFA device using two different authenticator apps: Google Authenticator for a smartphone and Symantec VIP on your computer.
K! Grab your phone and follow me!
Configure an MFA device for your root account using Google Authenticator App:
-
Open the app store on your phone and install the Google Authenticator app.
- Open Google Authenticator app and we’ll come back to it in a few steps.
- Now from your computer, login to your AWS root account.
-
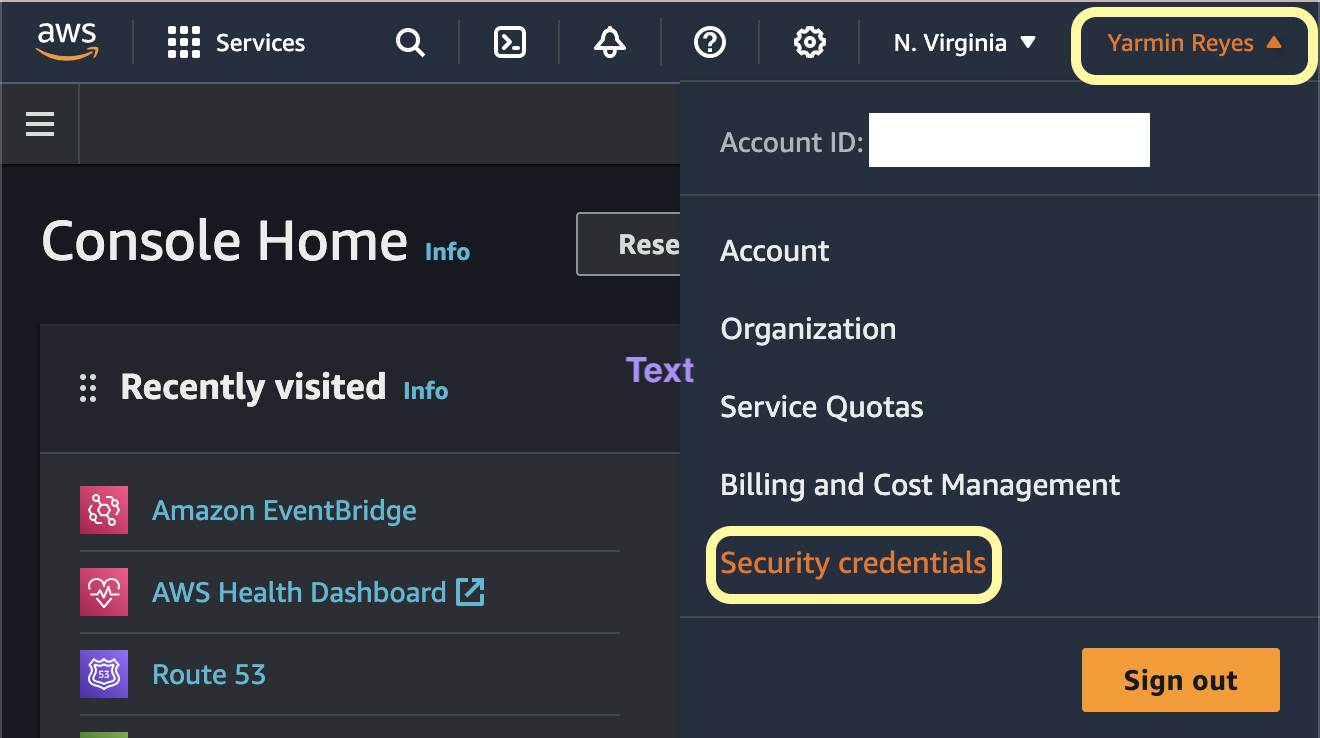
Click on your name at the top right corner of the console. Click “Security credentials” from the drop down menu.
-
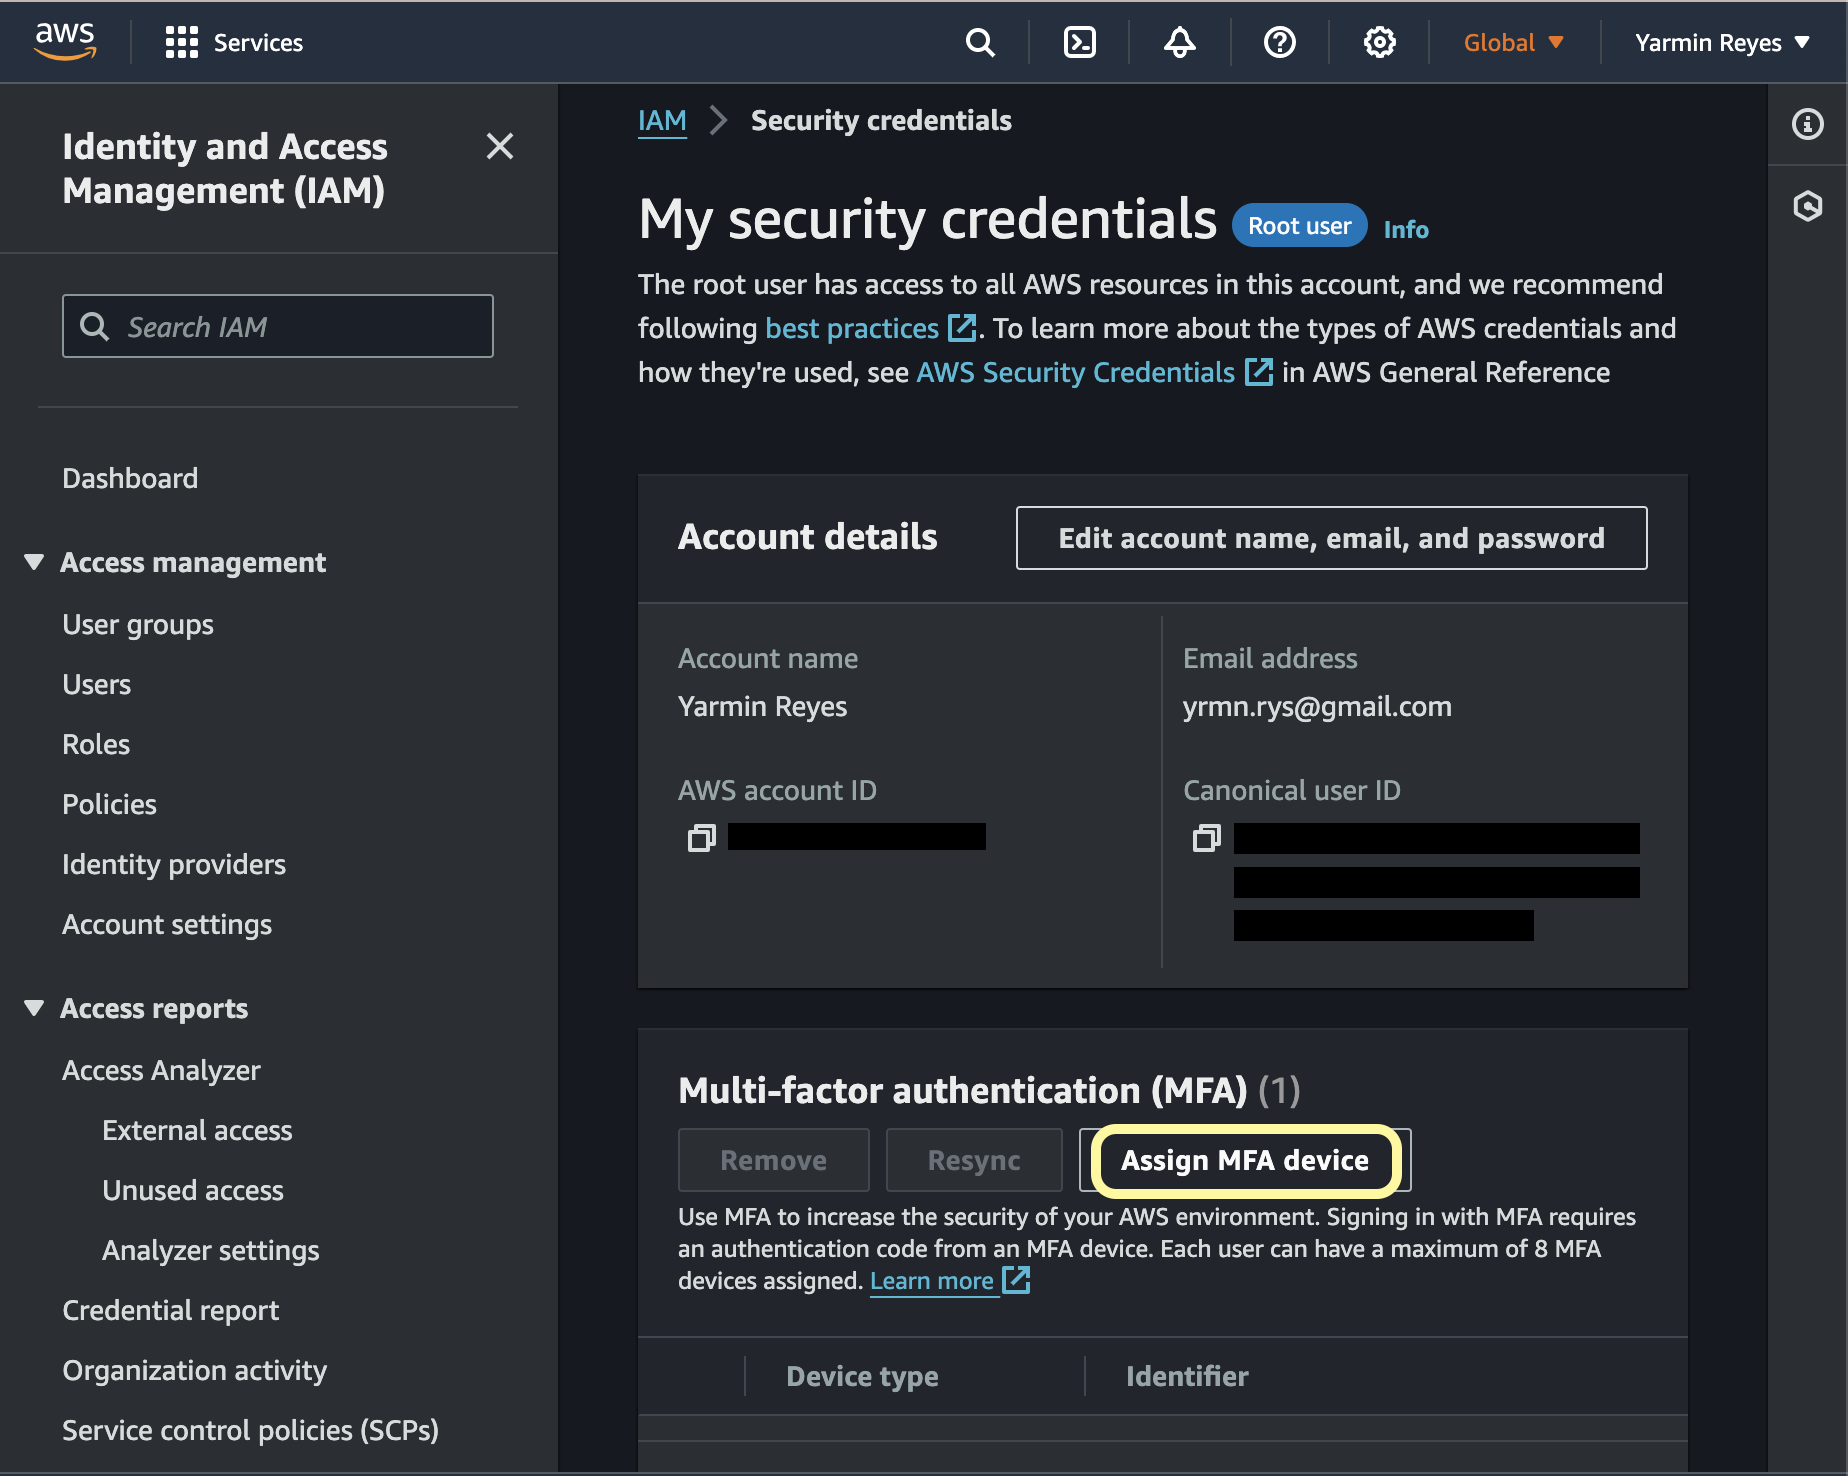
In the Multi-factor authentication card, click “Assign MFA device”
-
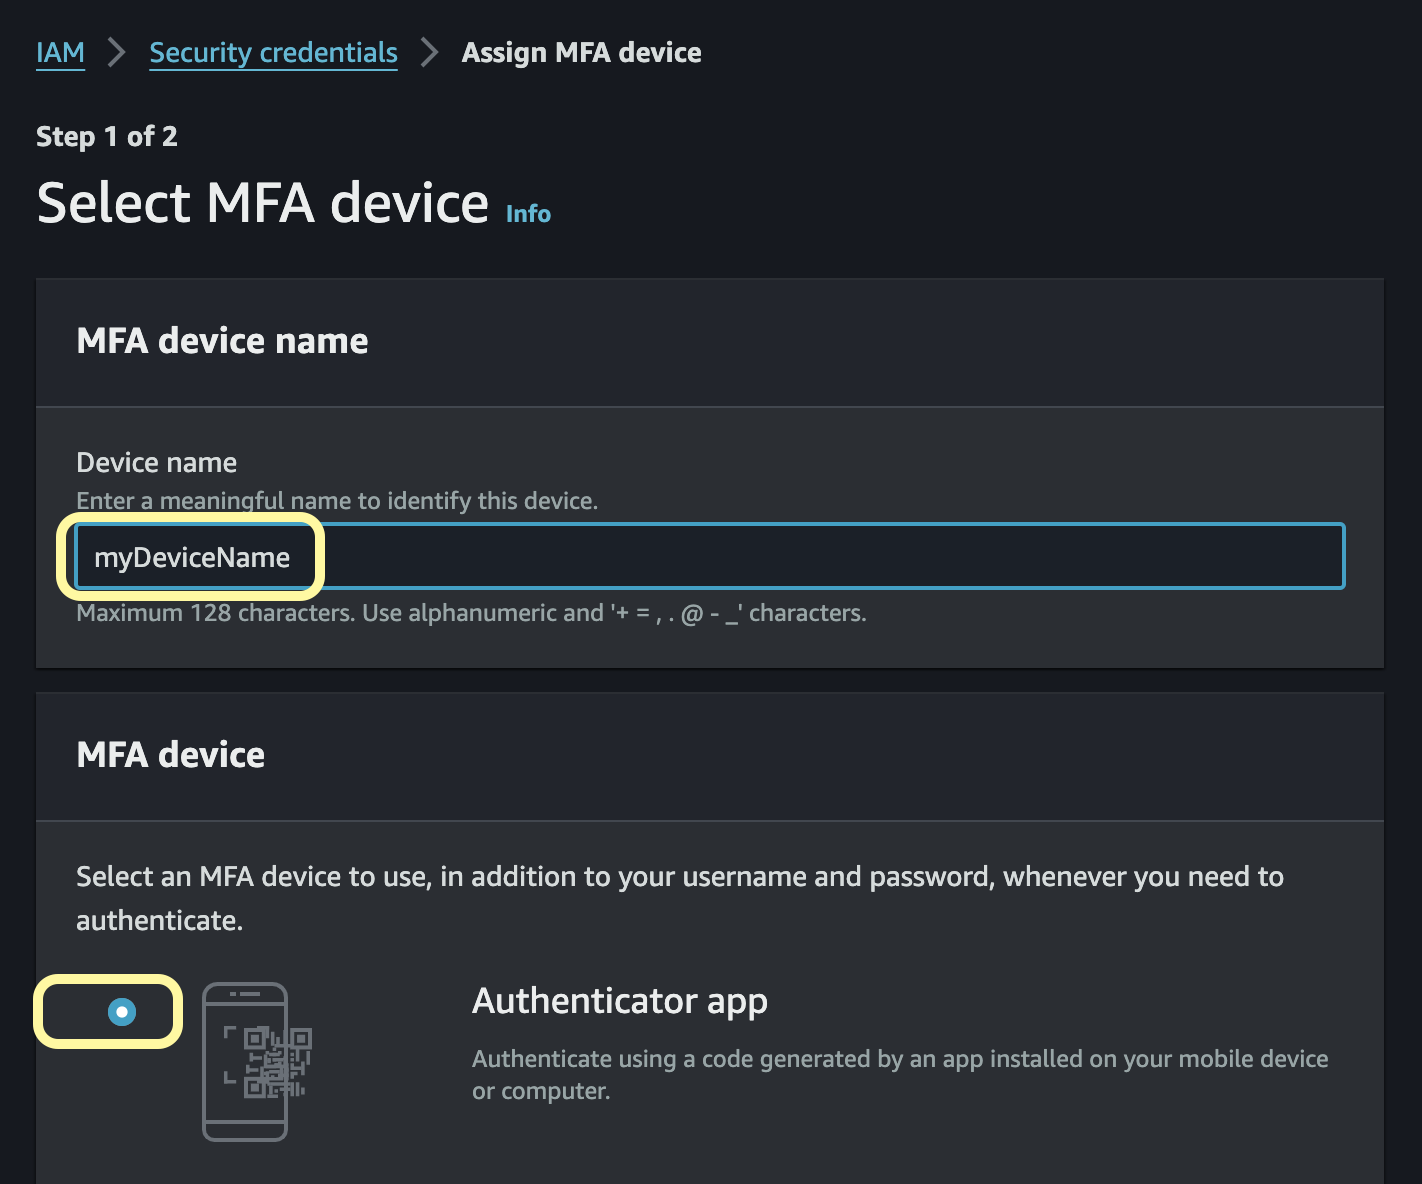
Enter a name that will identify your device, and select the type of MFA device you will use: “Authenticator app”. Click “Next”
-
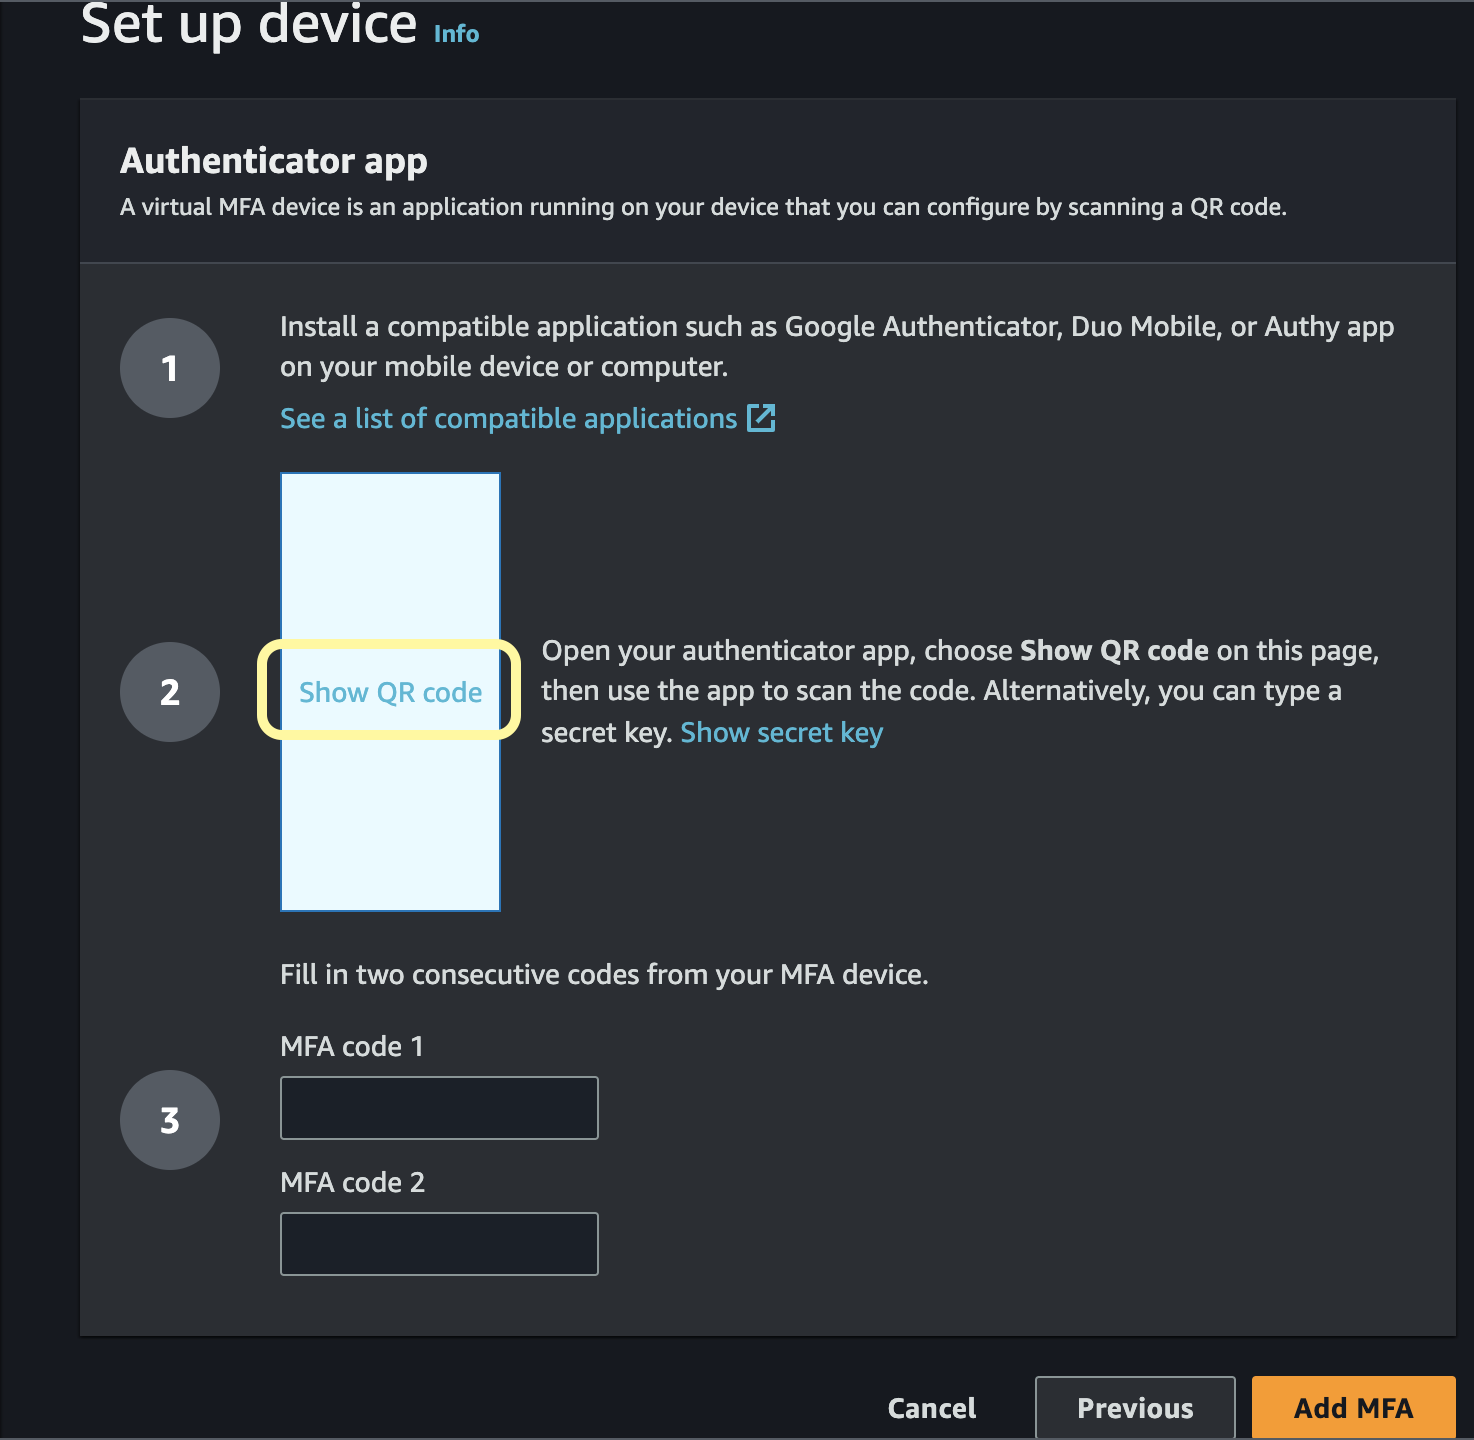
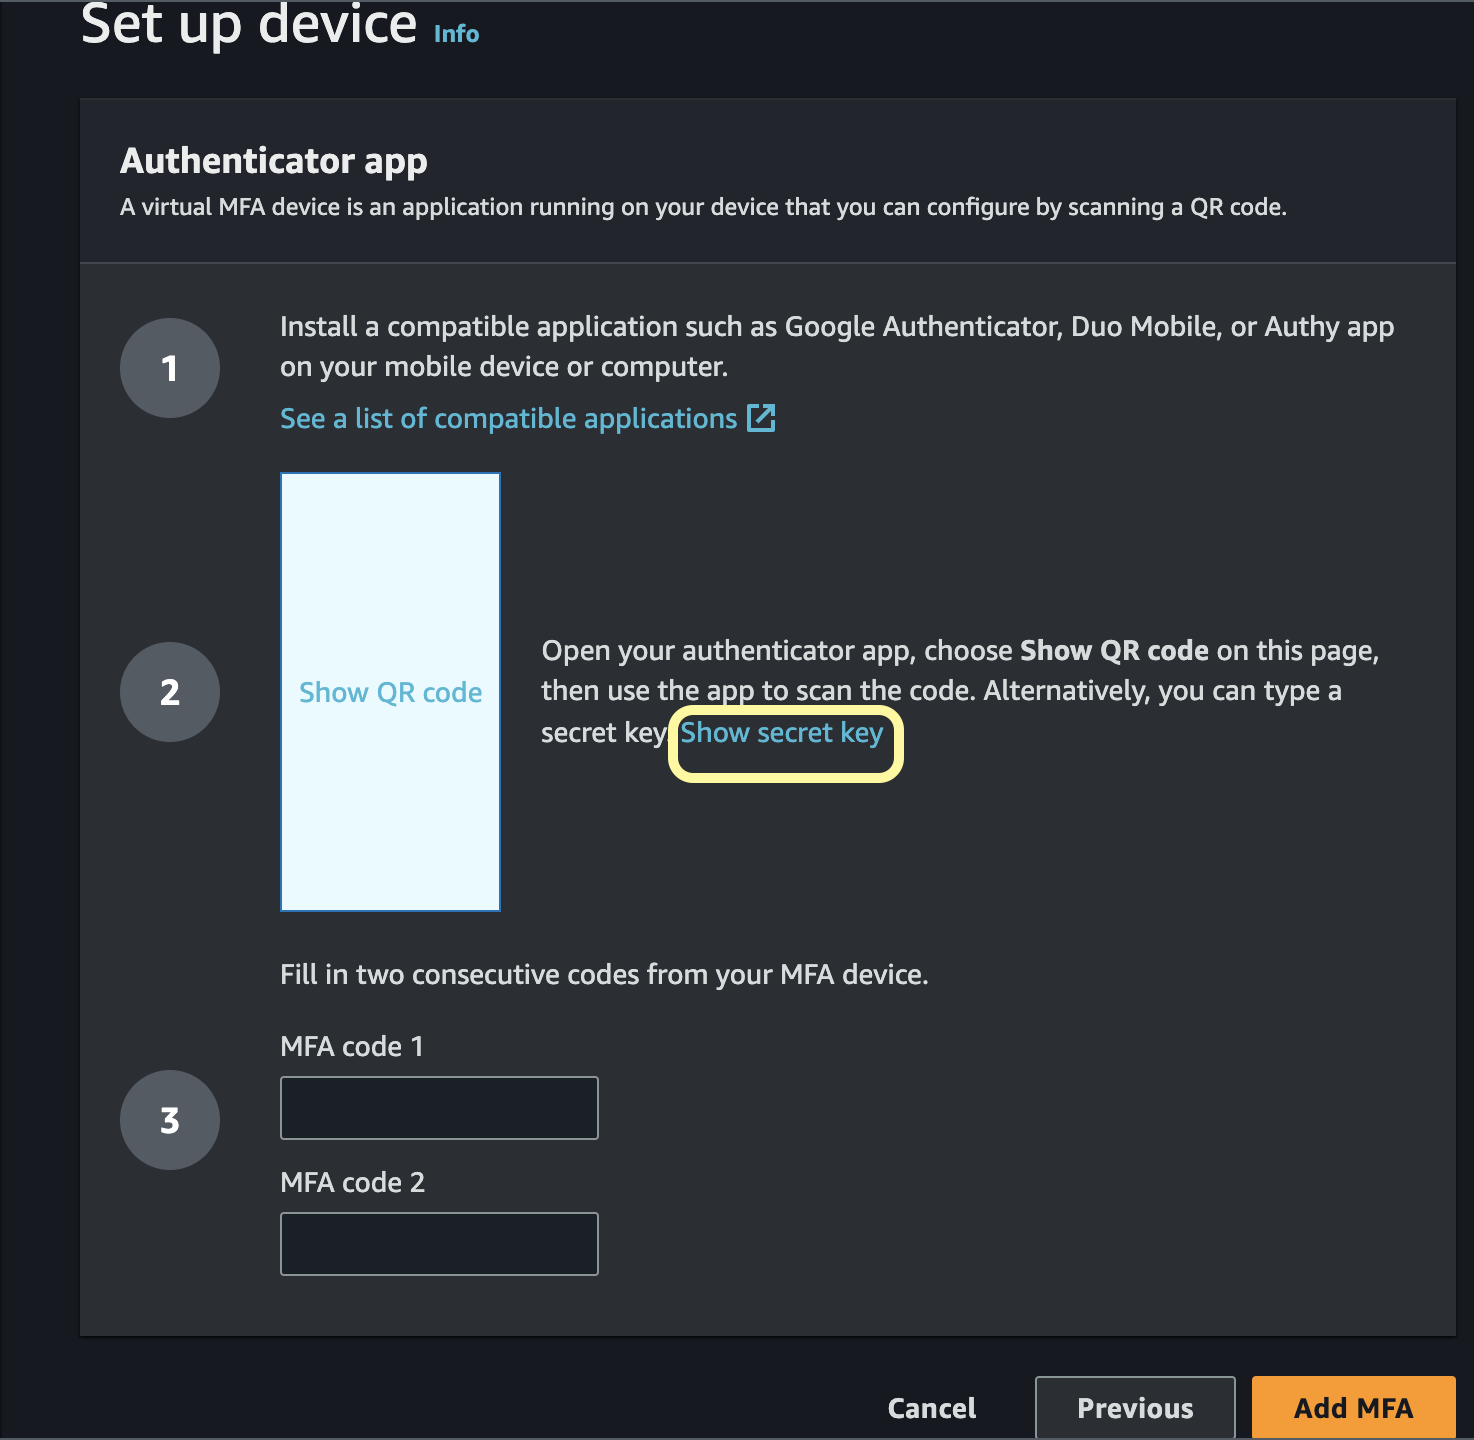
At #2 click on “Show QR Code”.
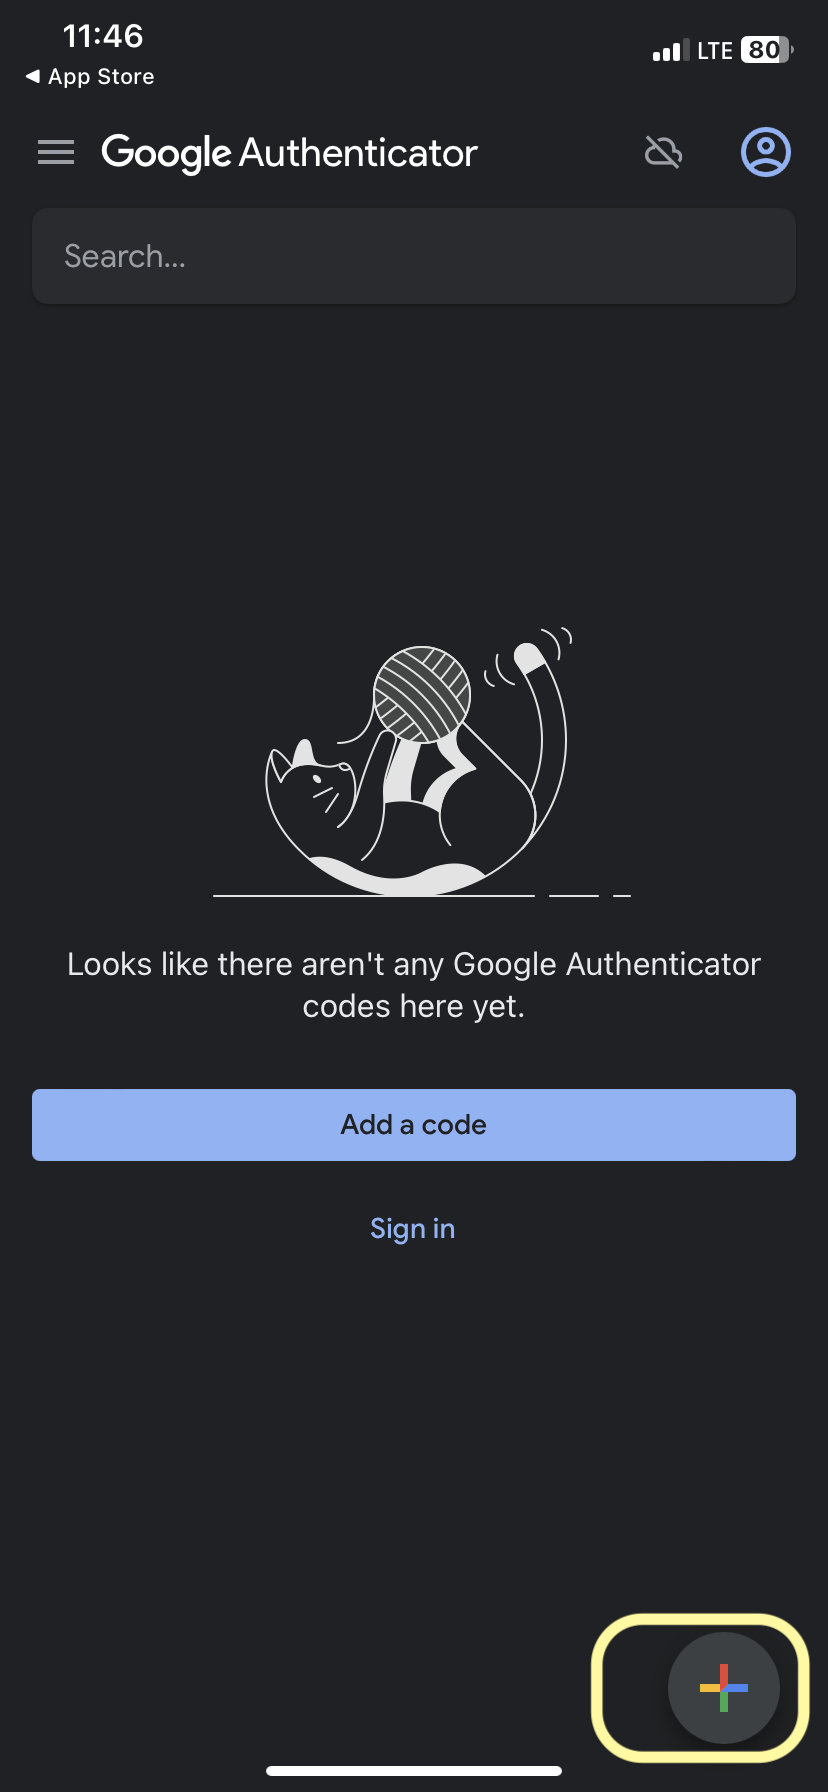
- Back on your phone click the plus (+) button on the bottom right of open Google Authenticator app screen. Select “Scan a QR code”.
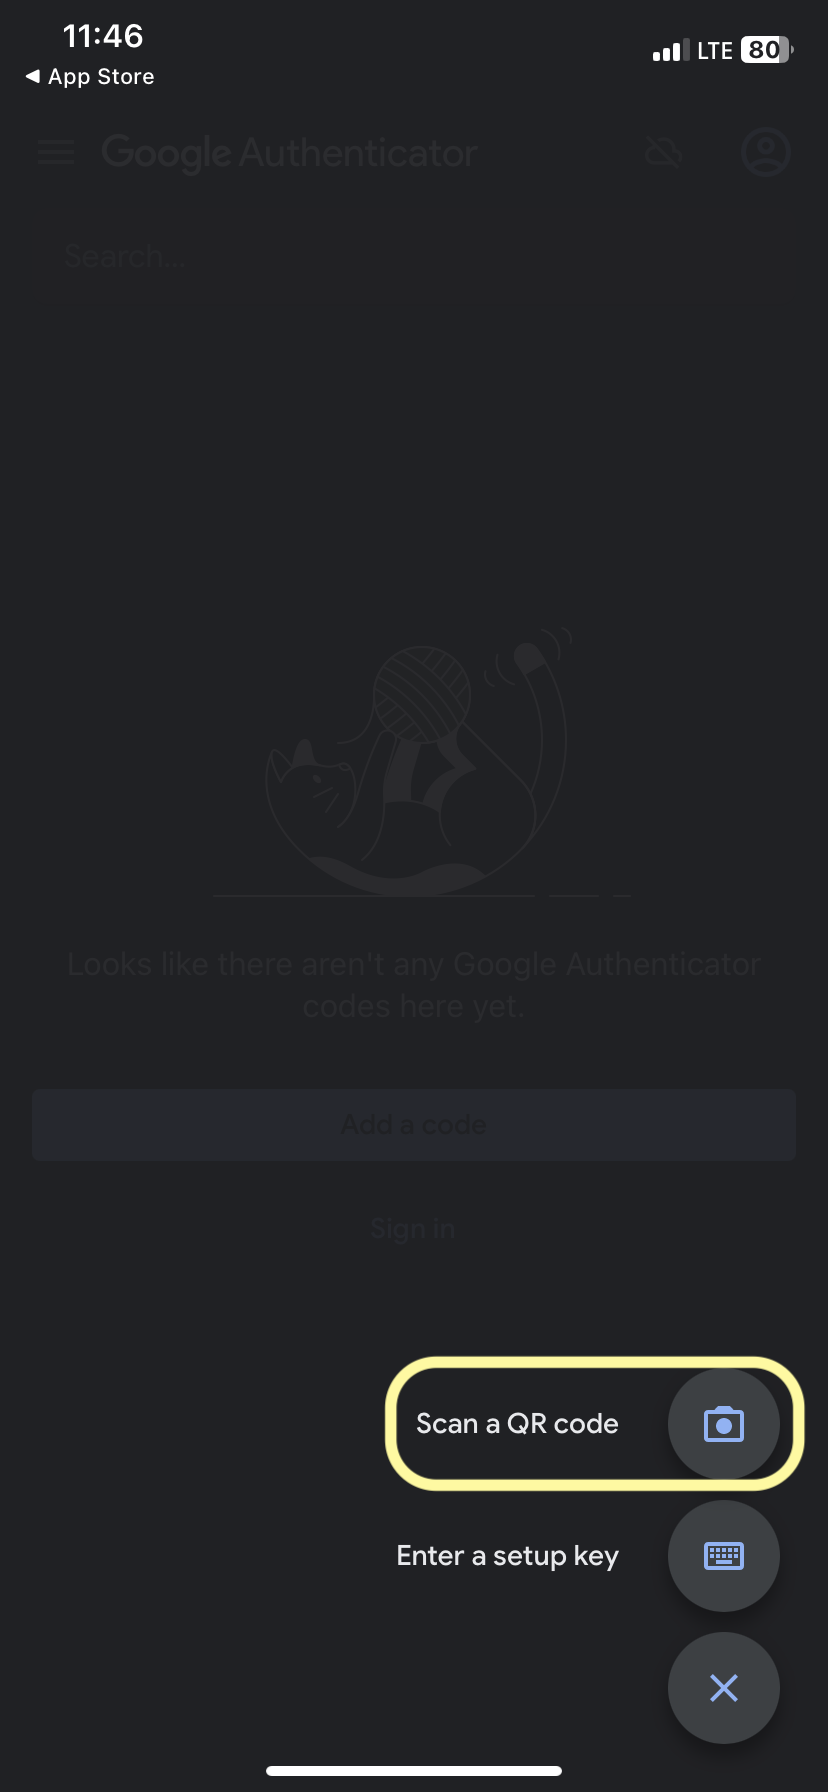
- Scan the QR code displayed on your console. You will see Google Authenticator app generate a code which will be regenerated after some seconds.
- At #3 on your console, enter two consecutive codes (wait a few seconds for a following code to be generated).
- Click “Add MFA” and you’re done!
With MFA enabled, your AWS account will be significantly more secure, giving you peace of mind as you use AWS services.
Something else to consider
Something else to consider is how you will authenticate if your designated MFA device suddenly becomes unavailable. Say, your phone battery died, or your phone is broken or lost. Well, to prepare for any such situation, it may be a good idea to have a secondary MFA device.
This is why I spent some time looking for a way to configure a device, in addition to my phone, for multi-factor authentication. I decided on my laptop. I faced some challenges here because many of the authenticator apps compatible to AWS were not available for desktops. Here’s what I found:
Though Symantec VIP offers a desktop app for Mac and Windows OS the functionality didn’t allow me to sync it with my AWS account; there was no option to scan a QR code or enter a secret code.
Twilio Authy, I was happy to find, offers a desktop application BUT will no longer be supported starting March 19, 2024. I decided to go with this option anyway for the meantime while I look for an alternative solution. Once I find one, I will circle back around and update this blog post.
Configure your computer as MFA device using Twilio Authy:
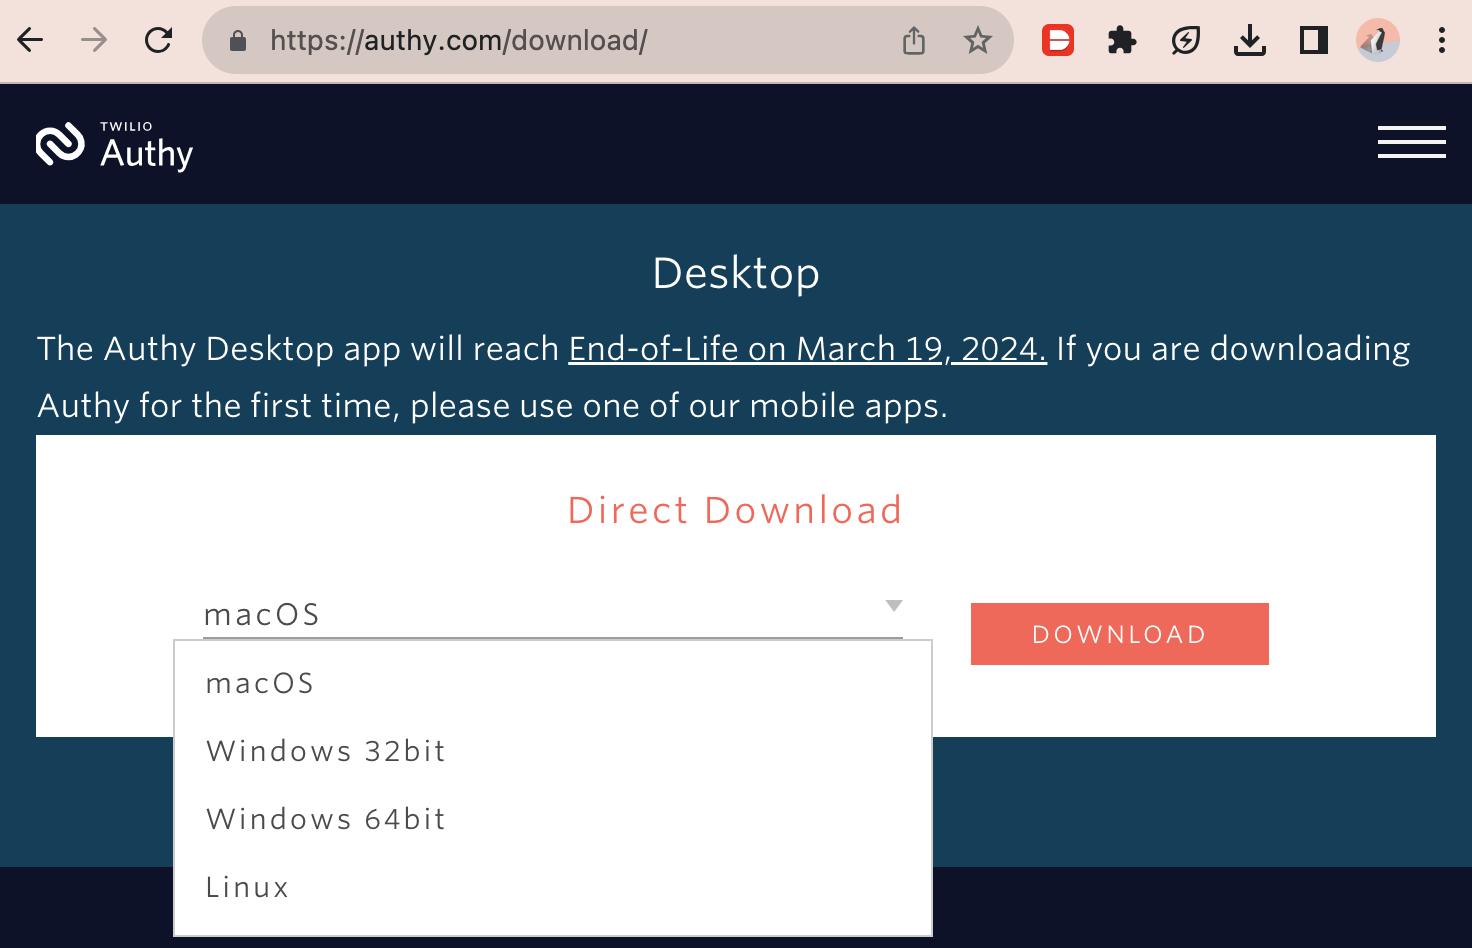
- On your computer visit https://authy.com/download/
-
Scroll down to “Desktop”, click the menu and select the appropriate OS for you, click “Download”.
- Follow necessary steps for installation.
- Enter your phone number where requested.
- Select preferred method to receive a verification code for your Twilio Authy account, enter code.
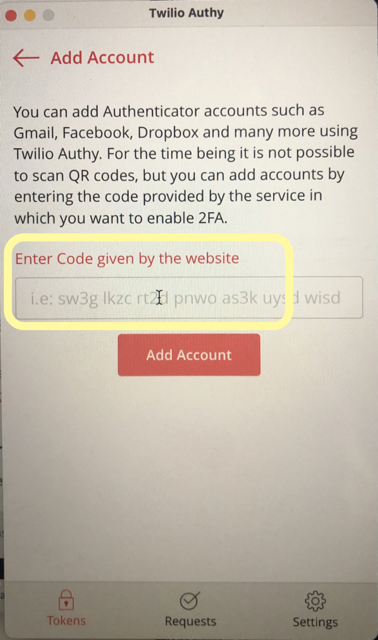
- You will see a request to “Enter Code given by the website”. This is where you enter the secret code provided at your AWS console. Let’s get you there again.
- Login to your AWS root account, click your name on the top right corner, click “Security credentials”.
- In the Multi-factor authentication card, click “Assign MFA device”.
- Enter a name that will identify your device, and select the type of MFA device you will use: “Authenticator app”. Click “Next”.
-
Here we are. Click the text that reads “Show secret key”.
-
Copy and paste that secret key where requested to add your AWS account to Twilio Authy.
- Enter a name for the account, scroll down and select “Amazon Web Services”, select “6-digit”, click “Save”.
- You will be given to option to Backup & Sync. I decided to skip this.
- Now click “Tokens” at the bottom left to reveal the 6-digit code you will enter at the AWS console.
- Back at the AWS console at #3, enter two consecutive codes (wait a few seconds for a second code to be generated).
- Click “Add MFA” and you’re done!
AWSome! We have taken a step to add security to our root account. I love this for us!
Next on Getting Started on AWS we’ll go over creating an administrative user so that we can reserve our root account for tasks that require root level credentials.